Sierra is here to show us how to make a beautiful sheet music banner.
Hi, my name is Sierra! I'm the blogger at Creative K Designs! I'm a newlywed with a passion for crafting! I am so excited to be posting on Linda's blog today! Her blog is simply amazing! I really enjoy her posts!
Likewise, I hope you enjoy this tutorial!! Stop by for a visit at my blog if you have a chance!

This wonderful BELIEVE sheet music banner was inspired by a similar one I found on Etsy. I LOVED it, but it it cost $40! It was $20 for a JOY banner, but I still didn't want to fork over the dough. So I thought, hey, I can make that! And I did. Here's how:
Materials:
-3 pages of sheet music (I did not have any on hand, so I looked up free sheet music online and printed some off on cream colored paper for a vintage look.)
-pennant pattern (Again, I looked up a pennant shape online and printed it off.)
-BELIEVE (or other word of choice) letters, printed onto cream colored paper and cut into circle shapes
-white crepe paper (Walmart, $1)
-twine (Hobby Lobby, $2 with coupon)
-hot glue gun and sticks
-distressing ink (not pictured, Hobby Lobby, about $3 with coupon)
-scissors
-pen
-hole punch (not pictured)

First cut out your pennant shape. Trace it onto the sheet music with a pen. Try to make the line as light as possible. I could fit three pennants on each sheet if I alternated the pennant from side to side.

Cut out your sheet music pennants. I had 7. Distress edges with Tim Holtz distress ink. I chose the walnut stain. I also rubbed the tips on the ink pad (just a little) to give a more aged look. Distress the edges of your letters too. Punch holes into both top corners of each pennant.
Also, about the letters, I used "Kunstler Script" in size 72 on Microsoft Word. Then I drew a circle on top of each letter using the Shapes application. I made the circle "go to the back" of the letter (so it didn't cover it up) by right-clicking and clicking on "send to back." The only purpose of the circle was so I could cut out each letter in a perfect circle. I can't freehand that!!
 Roll out 13 inches of crepe paper. Cut it in half length-wise.
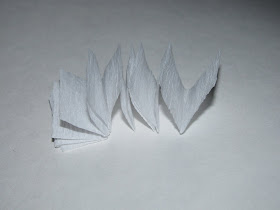
 Then fold it accordion style in about 1/2" folds. Make sure your two end folds are facing the same direction. (ie: both pointing up or both pointing down)
 This is the tricky part (if you've never done it before). It's easy as pie once you get the hang of it. Prepare two SMALL pieces of scotch tape in advance (about 1/4" thick).
Also, cut out a small square of paper (about 1"x1", this will stabilize the back of your paper flower and keep it together) and prepare your hot glue gun. Tape the crepe paper end to end. Carefully bring the center in tightly (you are making the flower flat). Keep your hand around the flower to keep it together. Now hot glue the small paper square to what will be the back of your flower.


Then simply hot glue the paper flower to your sheet music pennant. Repeat for all the pennants. This step took the longest. Probably around 30-45 minutes...but I was watching TV/talking on the phone, so I had some distractions! You can probably finish faster.
 Glue each letter on top of each paper flower.
Then I flipped them over (make sure to spell the word backwards when you flip it...EVEILEB).
And strung the twine through the holes. Then, just to make sure the pennants didn't slip at all I added a dab of hot glue underneath the center of the twine on each pennant.
 Ta-da! Isn't she beautiful!?!?


Enjoy crafting!!
Thanks Sierra! Like Sierra's banner? You *just might* want to check back a little later..... ;)
Be sure to enter today's Home Sweet Home giveaway!
Hi Linda. Sierra did a great job on the tutorial and her banner is so cute. Always learning something new! Thanks for sharing it. This will be a fun week.
ReplyDeleteMerry Christmas & Hugs...Tracy
Hi Linda. Sierra did a great job on the tutorial and her banner is so cute. Always learning something new! Thanks for sharing it. This will be a fun week.
ReplyDeleteMerry Christmas & Hugs...Tracy
love the banner TFS :D
ReplyDeleteSo pretty!
ReplyDeleteThank you so much for your wonderful tutorial!! I think I will try making a valentines banner- too late for Christmas I am too far behind already!
ReplyDeleteblessings mary