My name is Angela. I have been married to my best friend and THE greatest guy ever for the past 6 years. We have 3 handsome (I get in trouble when I call them beautiful) little boys - ages 4, 2 (almost 3), and 9 months. Needless to say - they keep me very busy. I get the privilege of staying home with them everyday. In my spare time (which isn't much) and to keep my sanity, I enjoy crafting. I do a number of things: sewing, quilting, cross-stitch, knit/crochet, papercrafts, scrapbooking, and on and on. My husband always teases me that I can't just sit down and relax, I have to have something crafty in my hands. Little does he know, that is how I do relax.Before I start - I have never done a tutorial before so if you have any questions just ask in a comment and I will try to clarify. Here goes:


 Step 4 - (Attaching batting and backing fabric) If you are personalizing do that now. Sew your personalized felt onto the backing fabric so that when rolled up you see it. Layer right side of front to right side of back then put piece of batting on top. PIN. Sew sides and top together - leaving bottom open for turning. Turn. Pin ribbon loop or elastic loop to middle of bottom and fold fabric towards inside so you can sew up the bottom. Do a blanket stitch on all four sides - this is how the bottom gets closed up. Roll up your mat and attach the button so that you can close it with your loop. That's it - YOU ARE DONE!!


Supplies needed
- 3 yds of cotton fabric; matching thread
- 27 pieces of 9 x 12 felt - 11 of color #1, 10 of color #2, and 6 of color #3
- a piece of batting 22 x 108
- button
- ribbon or elastic
- dry beans for the bean bag. I also have access to an embroidery machine which I use for personalization.

Step 1 -(Making Numbers) Find a font on Microsoft Word or other document program and print out numbers 1 -10 so they are 4 - 5 inches tall. Pin the numbers to color #3 of felt and cut out. Cut color #2 felt to 7 x 10 rectangles. Attach numbers to color #2 felt and then attach #2 to color #3. Sew numbers on and then sew color #2 to color #3.


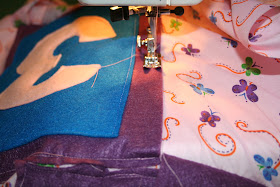
Step 2- (Attaching Numbers to Fabric) Cut fabric in half lengthwise - you should have 2 - 22 x 108 pieces. Arrange felt on fabric, pin, and then sew into place. (This is kind of a pain in the keester so TRY to do it right the first time. If you unpick the felt it messes up the dimensions of it and makes it an even BIGGER pain in the keester. I know this from experience!)


Step 3 - (Making the bean bag and bean bag pocket) Cut a 4 x 4 piece of felt and sew it on the by your number 1. Only sew three sides - leaving the top open - so it makes a nice little pocket. If you are personalizing the bean bag, you would do that now. Cut 2 - 3 1/2 x 3 1/2 pieces of felt - I used color #1. Sew three sides together - turn so seams are on the inside. Fill with dry beans and then hand sew closed.


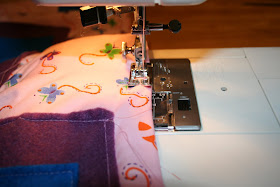
 Step 4 - (Attaching batting and backing fabric) If you are personalizing do that now. Sew your personalized felt onto the backing fabric so that when rolled up you see it. Layer right side of front to right side of back then put piece of batting on top. PIN. Sew sides and top together - leaving bottom open for turning. Turn. Pin ribbon loop or elastic loop to middle of bottom and fold fabric towards inside so you can sew up the bottom. Do a blanket stitch on all four sides - this is how the bottom gets closed up. Roll up your mat and attach the button so that you can close it with your loop. That's it - YOU ARE DONE!!


I hope that all made sense! It takes me about 6 hours from start to finish. Make sure if you have any questions to ask.These are for personal use only. Please do not make and sell these without permission. Thanks! Angela
Thanks Angela! What an awesome game for kids to play on a rainy day.
(added later) *It's been brought to my attention, Angela did not link to her blog in her intro. You can find Angela at Komfy Kountry Krafts.*
(added later) *It's been brought to my attention, Angela did not link to her blog in her intro. You can find Angela at Komfy Kountry Krafts.*
*Don't forget to enter yesterday's simpleSerendipities Surprise Giveaway and Warm and Welcoming giveaway!*
That's such a clever idea! thank you!
ReplyDeleteWhat a great idea! I love it! What is Angela's blog? Did I miss that in the post?
ReplyDeletefantastic idea :D
ReplyDeleteWhat a fun idea!!! I wish I had kids to make this for!
ReplyDeleteVery cute and fun idea. My girls would love this.
ReplyDelete-Crystal
I seriously LOVE this idea. I wish i saw this earlier, so i could make it for my nieces for CHristmas. But they will get it next year for sure!!! I have 2 little boys, but I think it would be super cute to do a boy themed one. With Cars or tractor, something they are totally into. Thanks so much for a great idea. What talent you guys have. Keep up the great work.
ReplyDeletei found your blog from sytyc! i was thinking of doing this for my kids a few weeks ago and see this! lol don't you love when that happens? great minds think alike! :)
ReplyDeleteWow Linda, you are so creative, I love all of your tutorials! I'd love to share a link to this tutorial on sewwhattoday.blogspot.com on February 14!
ReplyDeleteSo cute! I'm wondering what would be a good non-skid bottom to use? We don't have carpet so this would just be an emergency room waiting to happen!
ReplyDelete